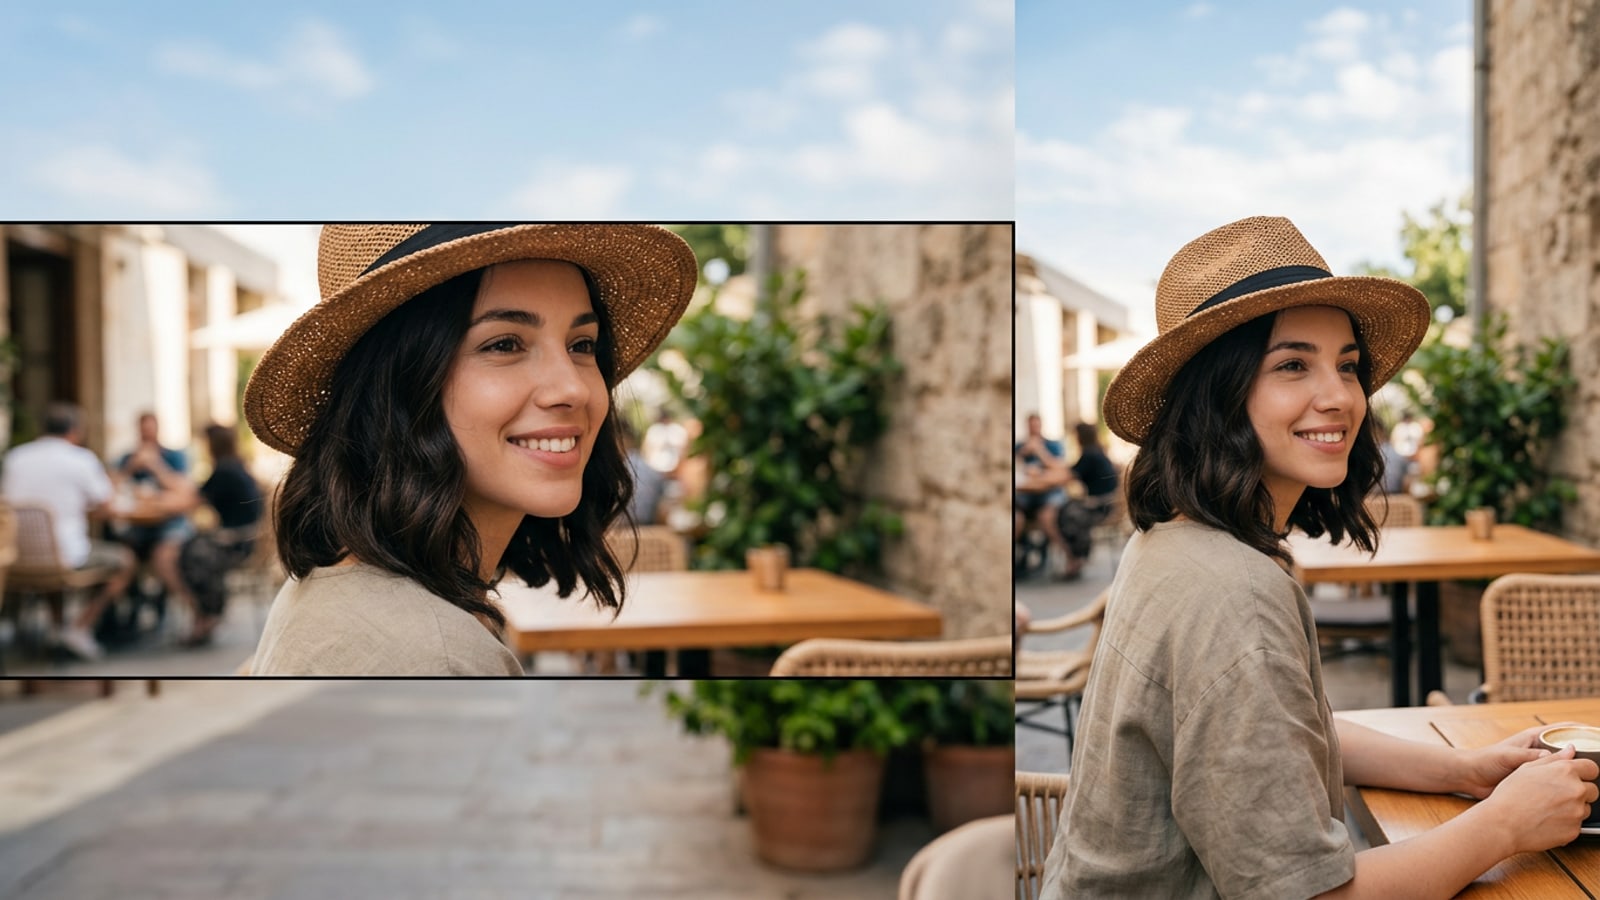
The Instagram Story Aspect Ratio Conflict: Pinch-to-Zoom vs. Letterboxing
Uploading non-vertical photos to Instagram Stories forces creators to choose between slicing off subject details or using unappealing side bars. AI outpainting provides a third, non-destructive alternative.
When you capture a portrait, landscape, or square photo on your iPhone, its default aspect ratio (such as 4:3, 3:2, or 1:1) rarely matches the full-screen 9:16 vertical canvas required for Instagram Stories. Uploading these standard photos natively triggers Instagram's default framing behavior: either the app automatically zooms in, slicing off hats, shoulders, and wide backgrounds, or it shrinks the photo down, placing heavy dark letterbox bars along the top and bottom edges.[1][2]
Pinching and zooming inside the Instagram story builder solves the canvas fill issue, but it destroys the compositional integrity of your photo. Critical subject features near the frame edges get cut out, and high-resolution shots lose visual impact due to aggressive digital cropping. Adding blurred side margins keeps the original frame intact, but letterboxed posts often look cluttered and less immersive on vertical feeds.[1][2][4]
Generative AI outpainting changes this dynamic entirely by moving away from destructive cropping. Instead of cutting into the original photograph to force a vertical fit, outpainting algorithms analyze the edge pixels, lighting direction, and scene textures of your photo to extrapolate new background space outward. This fills the native 9:16 canvas while preserving 100% of your original subject frame.[2][3][4]
- Pinch-to-zoom forces severe loss of subject detail along top, bottom, and side margins.[1][2]
- Letterbox margins preserve the original frame but result in unpolished, non-full-bleed story presentations.[2][3]
- Generative uncropping extends negative space around subjects without altering the original composition.[3][4]
Instagram Story Safe Zone Geometry: Pixel Dimensions for Clean Layouts
Understanding the exact pixel grid and overlay regions of the Instagram Story canvas keeps primary focal points visible and unobstructed by interface elements.
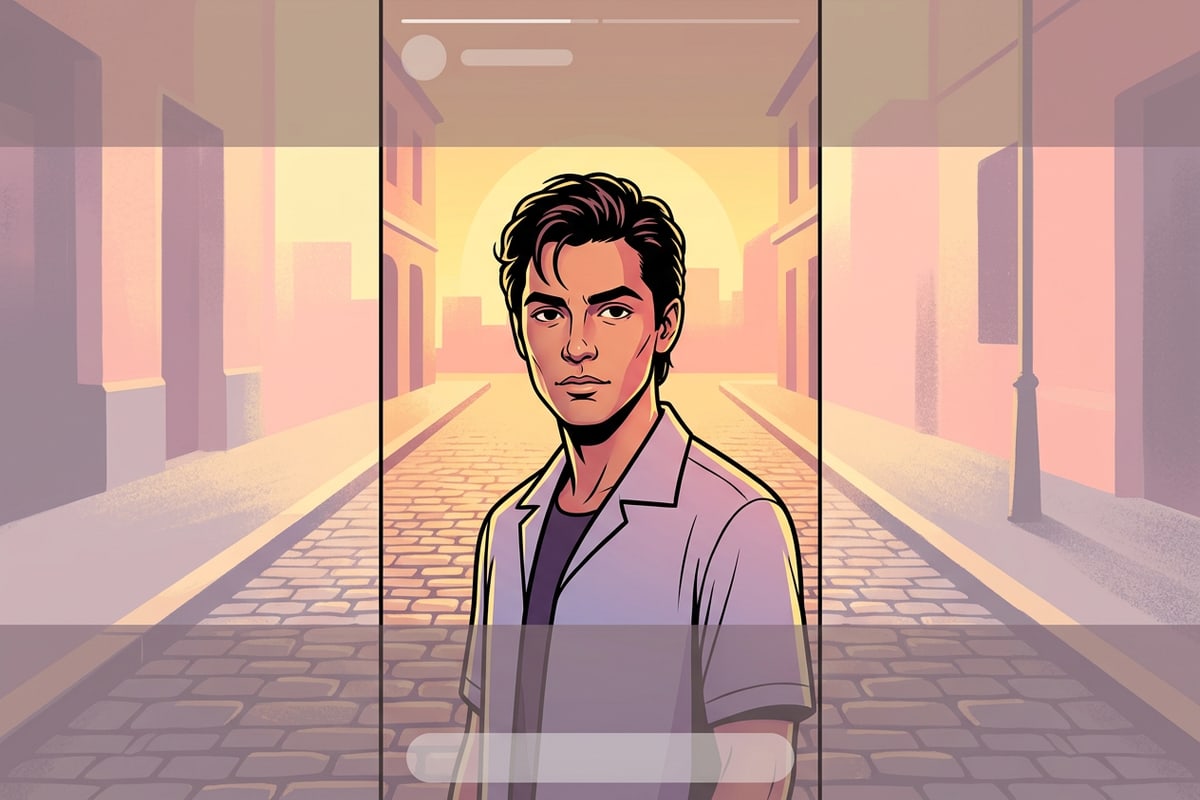
The standard digital display resolution for an Instagram Story on modern iOS devices is 1080 x 1920 pixels, which corresponds to a vertical aspect ratio of 9:16. However, creating a full-bleed 9:16 image does not guarantee that your entire canvas will be clearly visible to viewers.[1][2]
Instagram overlays persistent user interface elements across every story post. The top region, extending approximately 250 pixels downward, contains the account avatar, username, publication timestamp, and story progress bars. The bottom region, extending roughly 250 to 340 pixels upward, is covered by the message input box, quick reaction icons, and send buttons.[2]
To keep key visual elements clear of UI obstructions, your photo's main subject should remain within the central 1080 x 1330 pixel safe zone. When expanding a photo background using AI outpainting, the newly generated context directly occupies these upper and lower overlay zones, keeping busy textures away from your primary focal point.[1][2][3]
- Full Canvas Specs: 1080 x 1920 pixels in a 9:16 vertical ratio.[1]
- Top UI Header Zone: Approximately ~250 pixels reserved for account details and navigation bars.[2]
- Bottom UI Reply Zone: Approximately ~250 to 340 pixels reserved for reply inputs and reaction buttons.[2]
- Primary Focal Safe Zone: The middle ~1080 x 1330 pixel band where faces, outfits, and key subject details stay fully visible.[1][2]
Step-by-Step Pipeline: How to Uncrop and Extend Photos on iPhone with CARA
Follow this step-by-step iOS workflow using CARA's Image Extender tool to expand cramped photos into balanced vertical story assets.
Converting horizontal or square photos into balanced 9:16 story posts on your iPhone requires a clear outpainting workflow. Using CARA version 1.4.6 on iOS, you can extend photo borders outward using contextual AI generation without requiring complex photo editing skills.
CARA's dedicated outpainting capability generates realistic environment extensions that match original scene lighting, depth of field, and color spectrums. Each generation run costs a fixed charge of 30 points, providing a quick way to adapt framing before posting to social media.[3]
If your final extended canvas contains minor border artifacts or unwanted background objects, you can refine the output using complementary tools like Conversational Photo Editing in CARA Agent, AI Eraser for object removal, or AI Replace for targeted element swaps.[3][4]
- Outpainting generates contextual surroundings based on border pixel extrapolation.[3]
- CARA's Image Extender requires a fixed charge of 30 points per generation.
- Complementary editing options like AI Eraser and AI Replace handle quick post-generation touch-ups.[3][4]
- Open CARA and Navigate to Image Extender
Launch the CARA app on your iPhone or iPad. From the main tab bar, navigate through Home > AI Editing > Image Extender.
- Import Your Cramped Photo
Select the photo you wish to extend from your iOS camera roll. Works on square (1:1), camera landscape (3:2), standard portrait (4:3), or custom croppings.
- Generate Extended Background Canvas
Tap to generate. CARA processes the image (at 30 points per generation) and outputs a full-bleed 9:16 photo with contextually matched surroundings.[3]
Prompt Parameters & Lighting Formulas for Seamless Edge Extension
Master prompt parameters and directional lighting alignment to ensure newly generated background extensions match original camera perspective and blur.
Achieving seamless extensions during AI outpainting requires maintaining visual consistency between original photo pixels and generated edge areas. When diffusion models generate new border material, they sample edge pixels to estimate lighting angles, surface textures, and camera blur depth.[3][4]
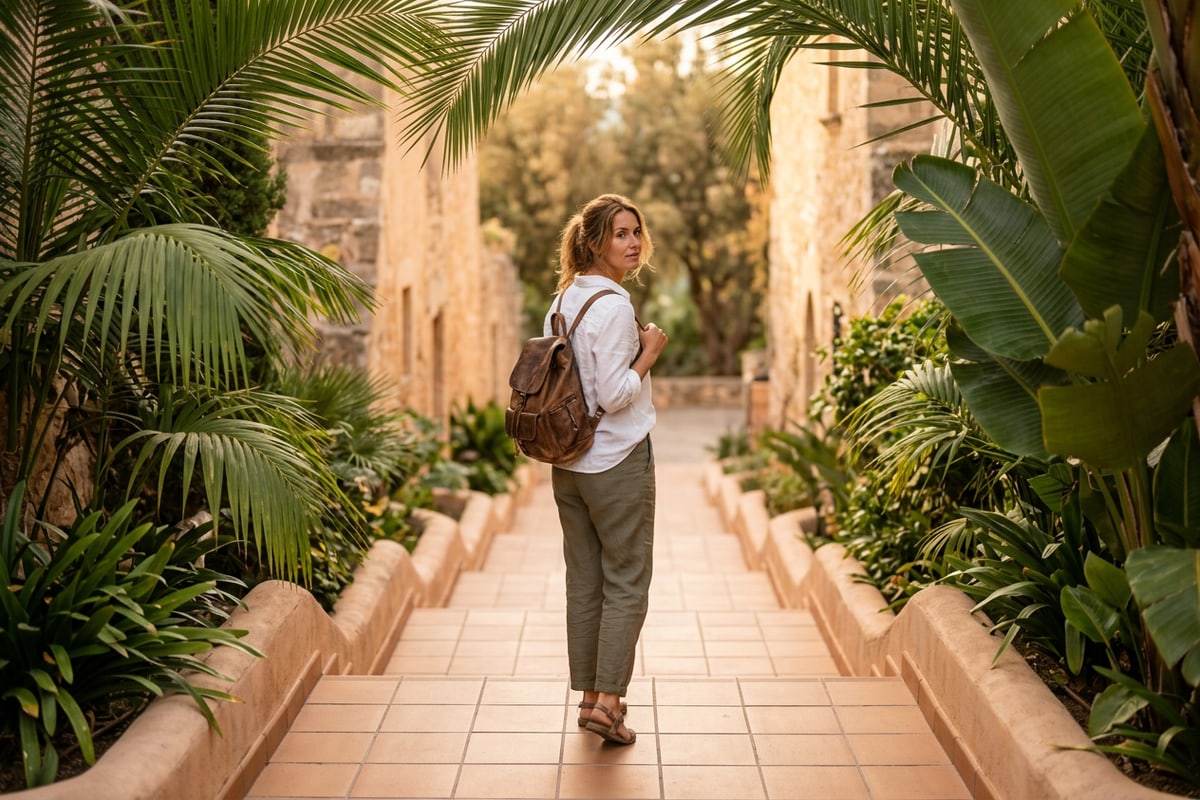
To achieve realistic extensions on complex backgrounds—such as outdoor foliage, urban architecture, or studio bokeh—you can guide generative inputs using precise parameter descriptions. If you wish to customize lighting mood or scenery during conversational edits, specifying light direction and lens traits prevents unnatural seam lines.[3][4]
If an outpainting run generates a slightly distorted object or unwanted artifact near the outer canvas edge, you do not need to re-run a full 30-point canvas extension. Simply use AI Eraser to clear small blemishes or AI Replace to swap out irregular objects with clean background textures.[3][4]
- Golden Hour Outdoor Formula: Specify 'warm low-angle sunlight, directional lens flare, soft bokeh foliage, seamless sky gradient'.[3][4]
- Urban Architecture Formula: Request 'continuing brick wall texture, horizontal pavement perspective, soft ambient shadow continuity'.[3][4]
- Studio Portrait Formula: Use 'neutral gradient backdrop, soft key light spillover, smooth vignette falloff'.[3][4]
- Micro-Correction Strategy: Use AI Eraser or AI Replace to touch up localized generated anomalies instead of repeating full extensions.[3][4]
Edge-Case Troubleshooting: Resolving Complex Edge Patterns and High-Contrast Subjects
Learn how to troubleshoot difficult outpainting scenarios, including repeating architectural grids, high-contrast border subjects, and harsh background lighting shifts.
When outpainting photos featuring complex geometric patterns—such as tile floors, brick facades, or striped clothing—diffusion algorithms can occasionally struggle with exact alignment across generated borders. High-contrast subjects located directly along the edge of the original frame may also produce duplicate limbs or altered shadow gradients.[3][4]
To resolve repeating pattern glitches or awkward edge duplicates, combine outpainting with targeted post-processing tools. Using AI Eraser in CARA allows you to clear small edge anomalies, while AI Replace lets you swap misaligned geometric lines with uniform textures like neutral wall surfaces or organic foliage.[3][4]
- High-Contrast Edge Isolation: Shift your initial crop slightly inward if a subject's hands or hair sit directly on the photo border.[3][4]
- Geometric Pattern Alignment: Use AI Replace to smooth over misaligned tile grids or brick patterns generated along extended margins.[3][4]
- Lighting Gradient Smoothing: Clean up harsh light transitions using localized conversational edits or erasing unexpected border artifacts.[3][4]